
Salesforce DevOps Center Beta is a new way of managing and releasing Salesforce changes that do not rely on Change Sets.
DevOps Center is a new product that significantly improves the change and releases management process when developing with Salesforce. It enables you to take advantage of modern DevOps best practices via a centralized, user-friendly interface. The following are some of the key features of the DevOps Center:
- Organize your work: Work Items, a new object designed for DevOps Center and open to standard Salesforce Flows and other operations, can be used to track and deploy the associated changes.
- Track changes automatically: Changes in development environments are automatically tracked as they are made. In DevOps Center, you can view a list of changed metadata components and select the ones you want to migrate.
- Integrate seamlessly with GitHub for source control: All you need to do is connect your Github account and the DevOps center handles the rest.
- Deploy changes with clicks: You can create a visual representation of your deployment pipeline, then click to deploy changes from one stage to the next.
If you’re a developer using the CLI, VS Code, or GitHub directly, the DevOps center can track the changes made outside the DevOps center-connected org as well. It is designed to work for low-code and pro-code teams. This means you can work inside or outside of the DevOps Center UI-based application and everything will remain in sync.
Similarly, the admins can now use DevOps Center to contribute to the project’s shared source of truth in the source control repository.
How we can get our hands on it?
DevOps Center Beta can now be enabled and installed in Setup via a new “DevOps Center” page. If you have a production org with the Professional, Enterprise, or Unlimited editions, or a Developer Edition org, you can enable and install DevOps Center from this page. you can also test it out in a scratch org.
Install and Configure DevOps Center (Beta)
I’m going to use developer org to install and configure the DevOps center for demonstration purposes.
- From Setup, enter DevOps Center in the Quick Find box, then select DevOps Center.
- Click the toggle to enable DevOps Center, and then review and accept the license agreement.
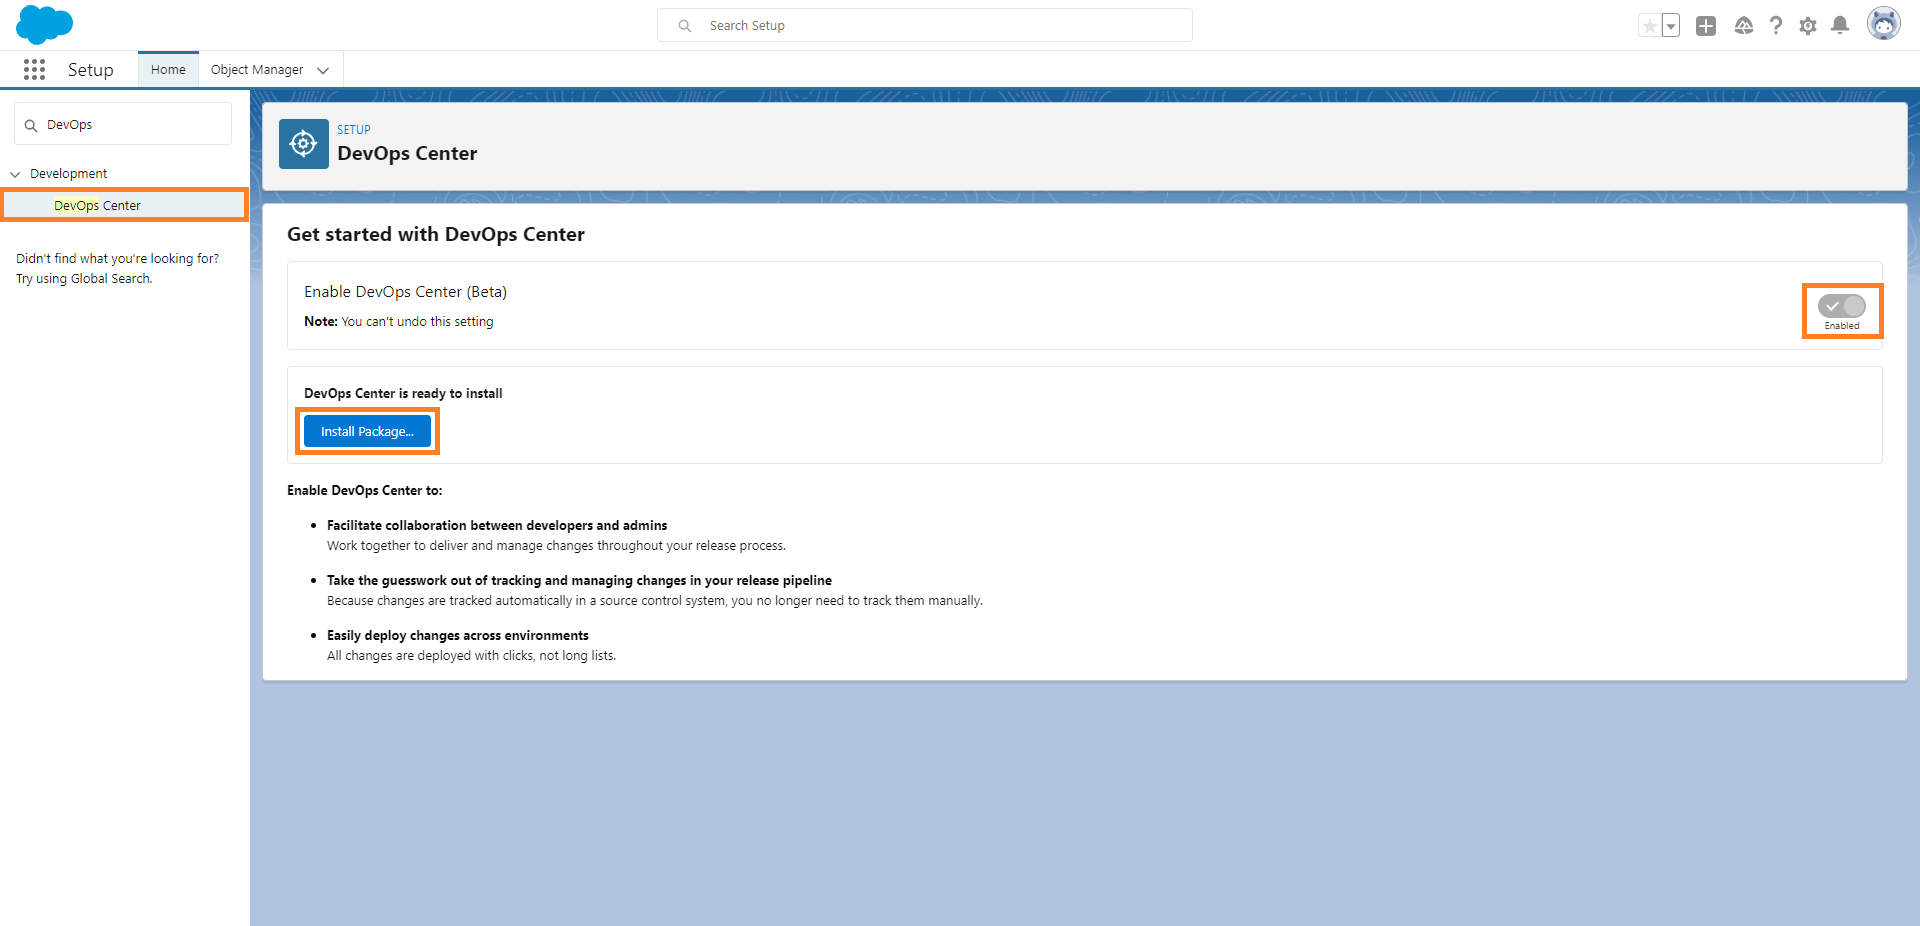
- Click Install Package. After the installer launches, you’re guided through the installation process to install the latest version of the DevOps Center-managed package. You can come back to this Setup page to reinstall or upgrade the package.
- Select Install for Admins Only, and then click Install.

- Approve third-party access to login.salesforce.com and test.salesforce.com.
You can confirm the successful installation on this page.

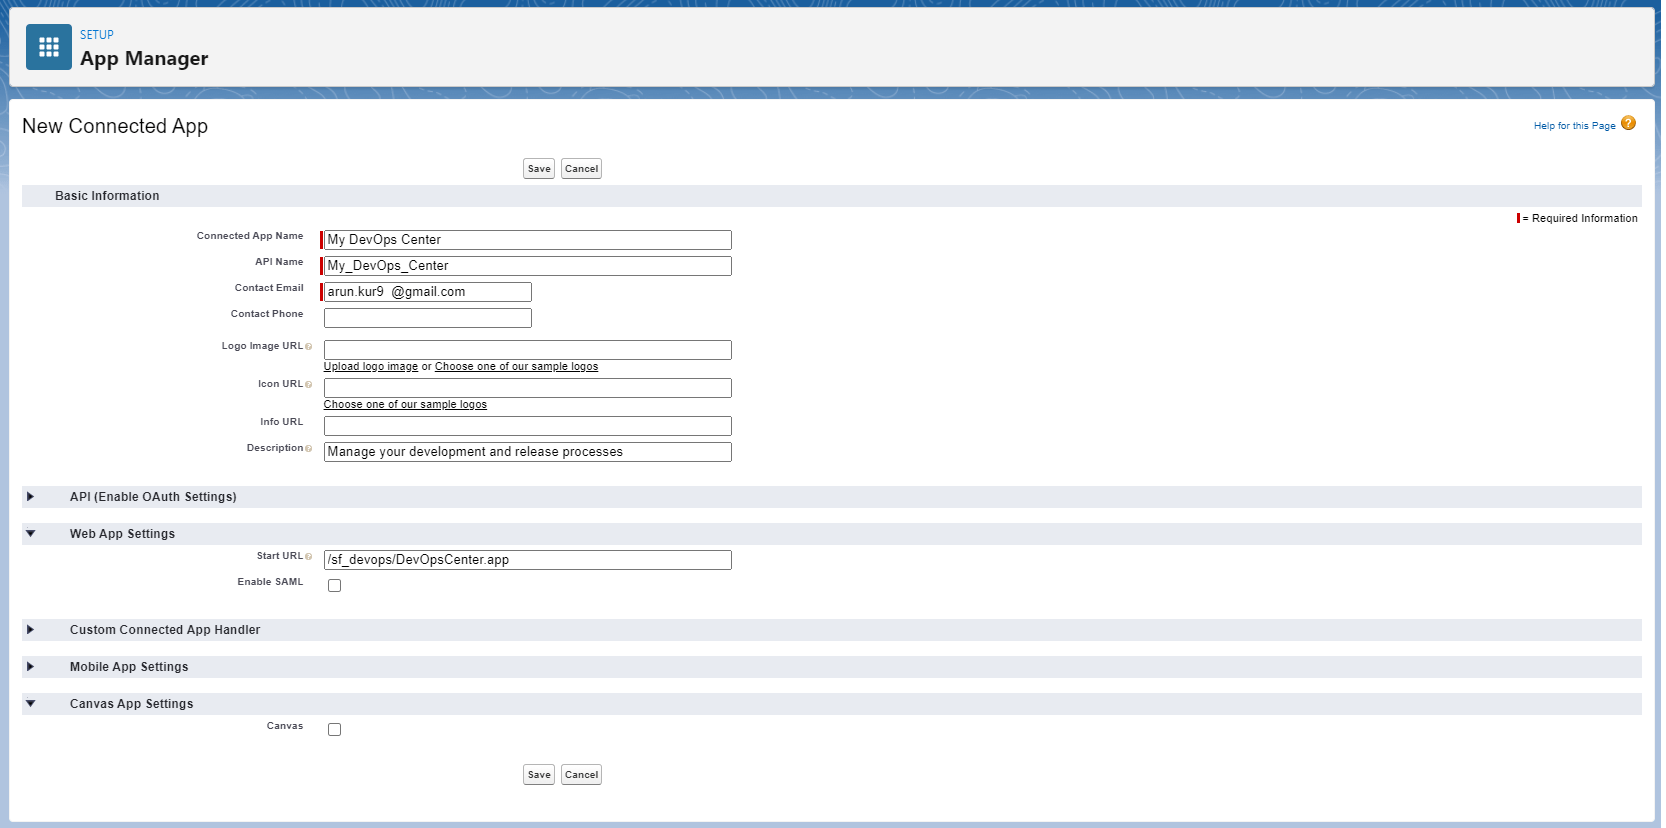
Create the Connected App
- From Setup, enter App Manager in the Quick Find box, then select App Manager.
- Click New Connected App.
- In Basic Information:
- Connected App Name: DevOps Center
- API Name: DevOps_Center
- Contact Email: your email address
- Description: Manage your development and release processes
- In Web App Settings, enter the Start URL: /sf_devops/DevOpsCenter.app
5. Click on Save
6. In Manage Connected Apps, click Manage.
7. In the Permissions Sets section, click Manage Permission Sets.

8. Select sf_devops_NamedCredentials, then click Save.
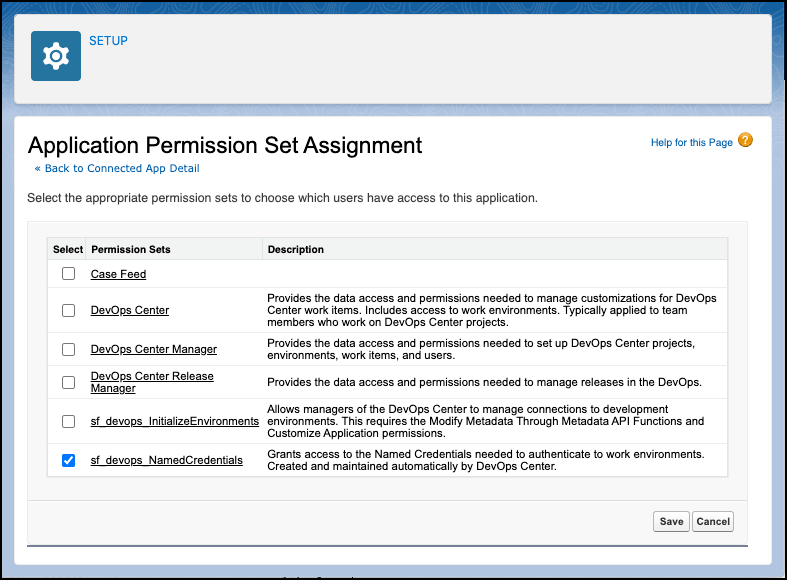
Assign the DevOps Center Permission Sets
Assign permission sets to everyone working on your project in DevOps Center. Consider who needs to change project-level settings (such as adding another work environment) and who needs access to only work items.

Add IPs to your GitHub organization
If you have restricted access to the GitHub organization assets by configuring an allow list, add the IP addresses for the DevOps Center app.
Check out this link for managing allowed IP addresses for your GitHub organization.
- Add these IP addresses to your GitHub organization’s allow list:
- 52.43.33.118
- 44.230.180.227
- 44.225.154.211
- 100.21.209.24
- Add the Salesforce IP address ranges for the org’s region. See Salesforce IP Addresses and Domains to Allow.
Now search the connected app name in the app launcher and select.
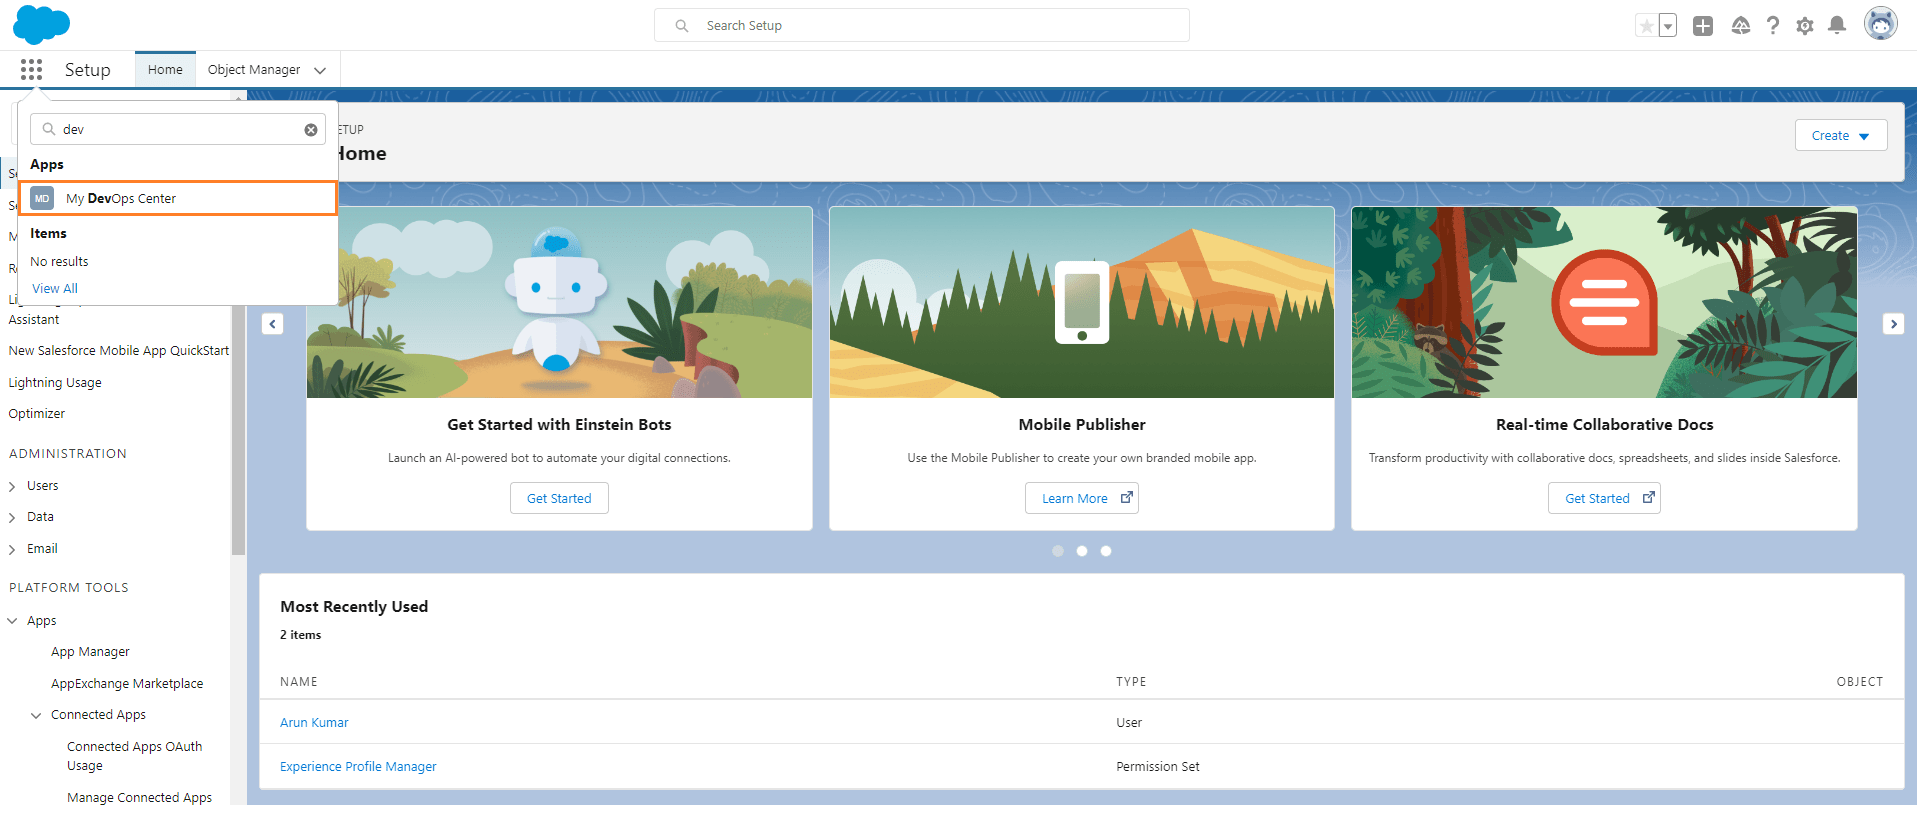
The DevOps Center (Beta) app page will look like the screenshot below.

Create Project
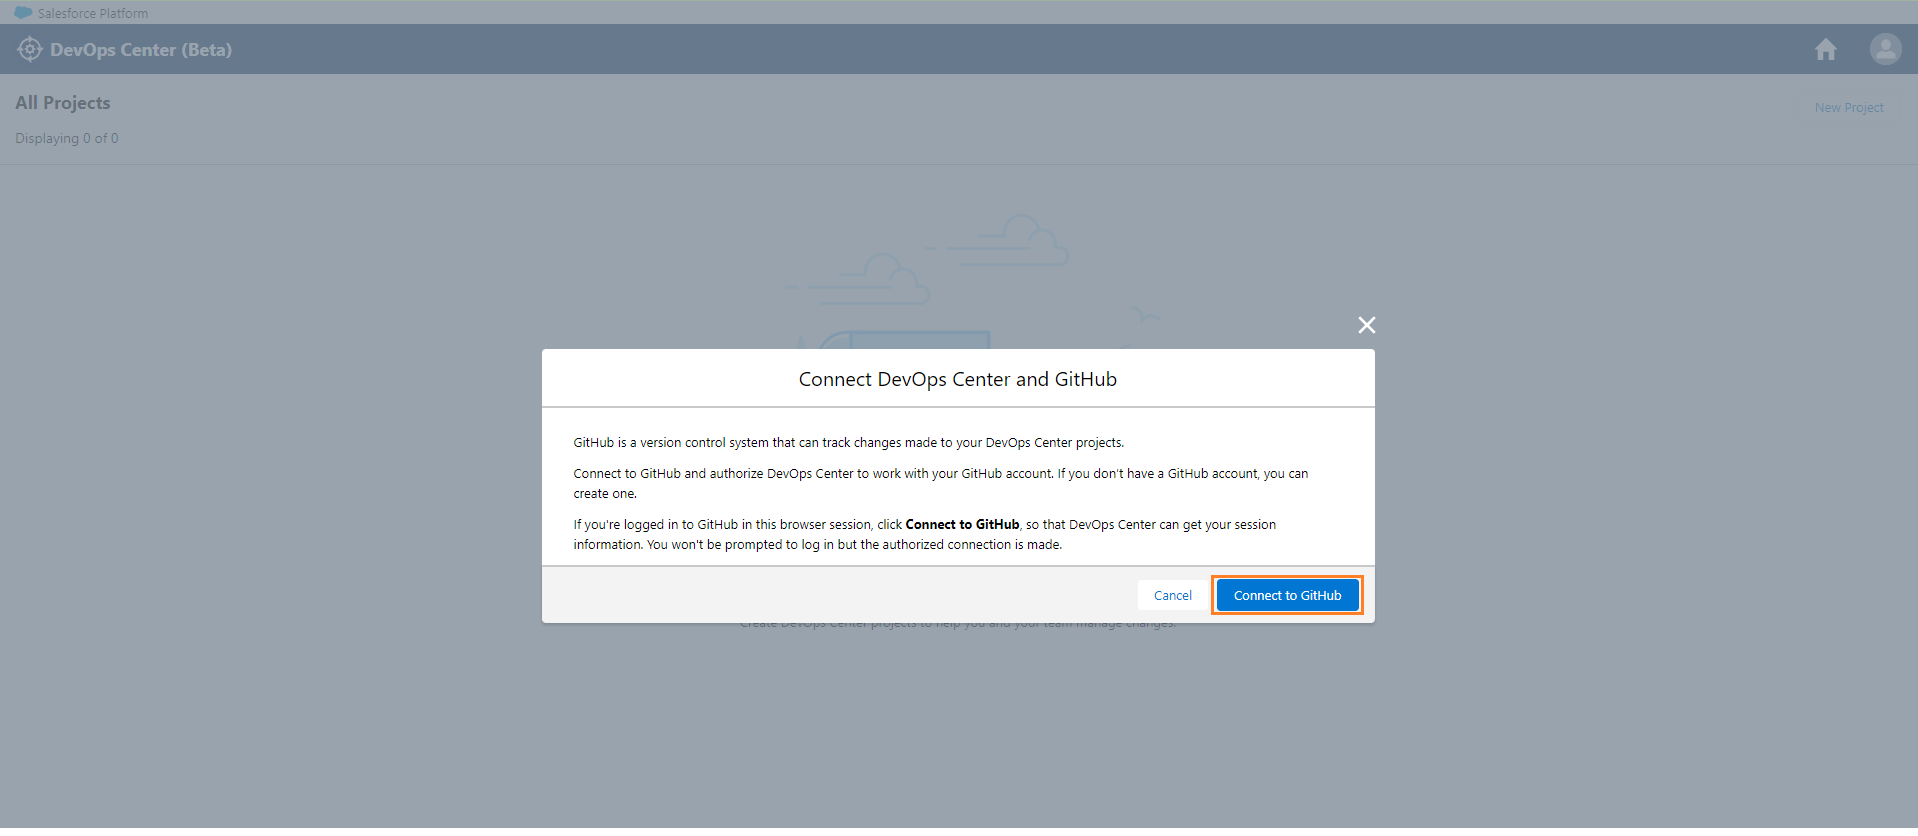
Click on the “New Project” button on the DevOps center (Beta) app page. You will see the screen to connect DevOps Center and GitHub. Click on “Connect to GitHub” (login and authorize your account) to connect your GitHub account with DevOps Center.
After a successful connection, you will be redirected to the DevOps center app page.
Click on the “New Project” button again. Enter the name of your project, and you have the option to create a new repository or you can choose an existing one.

Click on the Save button.
Add the Release Environment for the Project
Projects require a release environment (often your production org) and one developer environment. Ascertain that all team members are users in this environment if they need access to it to perform deployments from DevOps Center.
- On the All Projects page, under Release Environment, click Click to Connect.
- Provide a unique name for the production environment and indicate the environment type. By default, DevOps Center populates this field with the project name + Release. Environment names must be unique across projects.

- Click Log In.
- Log in to the environment. After you authenticate successfully, allow DevOps Center to use an OAuth process to remember your credentials. The release environment URL is now listed on the Projects page. Now define the development environments for this project.
Add Development Environments to the Project
Environments are where you write code, test it, and release applications and new features. During the pilot, environments are limited to Salesforce org.
On the Project page, click the highlighted link text under All Environments.

You will be redirected to the setting page where you have to click on the “Add” button.
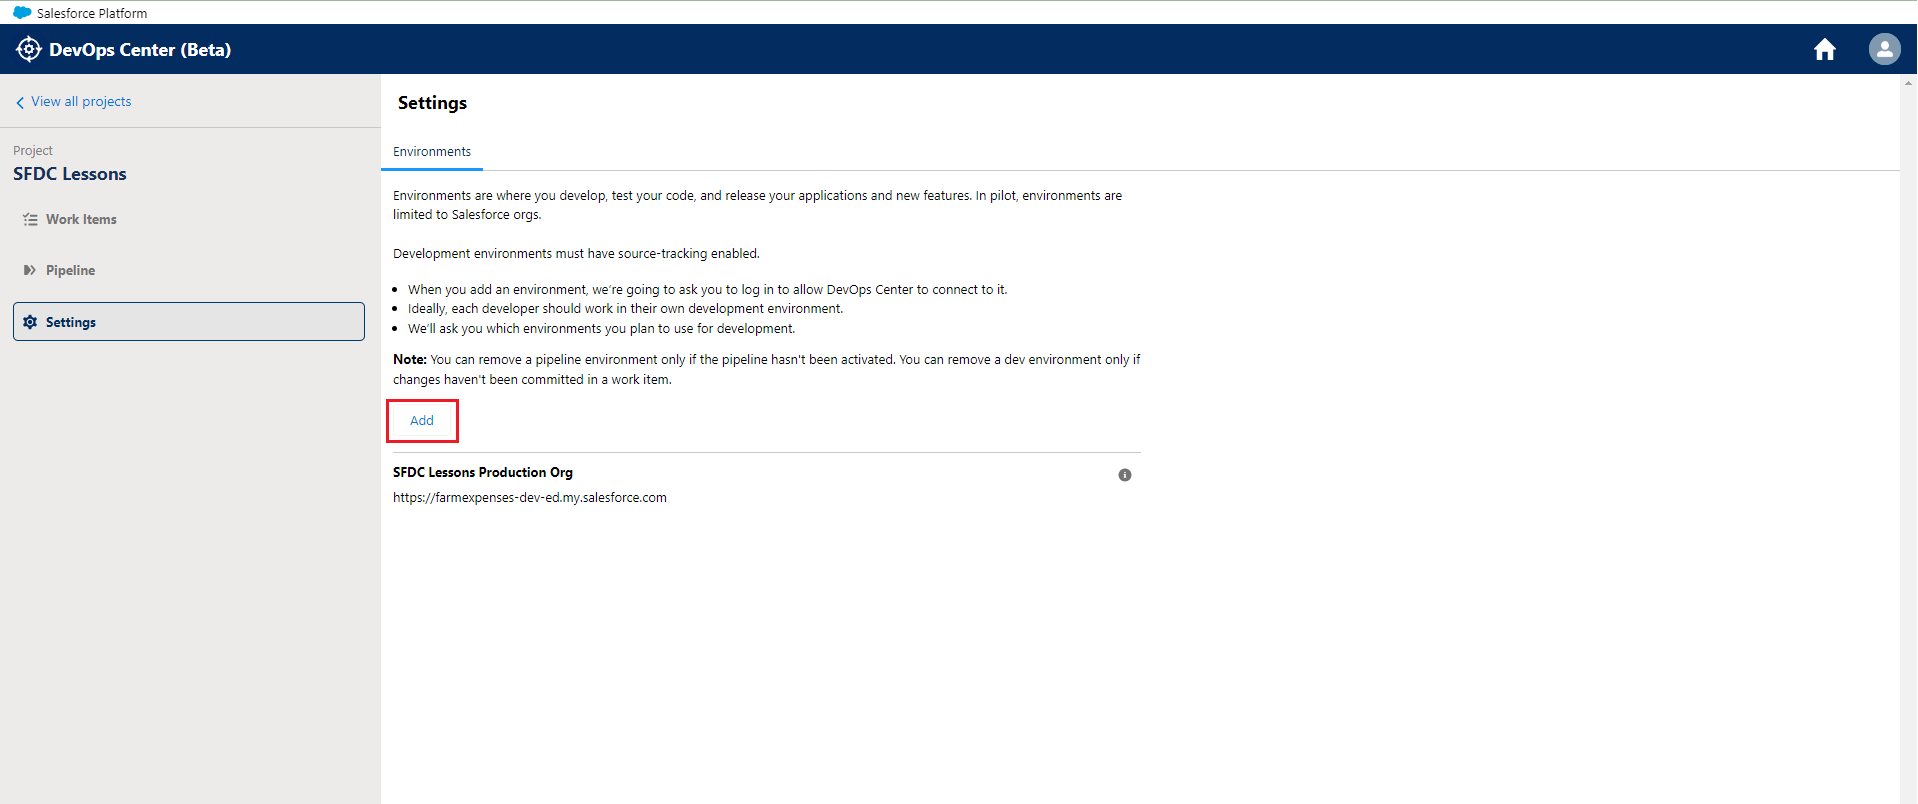
After clicking the “Add” button, you will be presented with a modal box in which you must enter the name of your environment and select the type: Production org OR Sandbox/Scratch org. For example, I have given environment name = INT and selected Production org ( to connect a developer org)
Click the “Log In” button and enter your credentials; after successful authentication, you will be redirected back to the settings page.

Repeat the preceding steps to add additional environments as needed, such as UAT, Staging, and so on.
The development environment must have source tracking enabled. You can add Sandbox orgs to your real project, but for testing purposes, you can add a scratch org to use as a development environment.

Finally, after adding all of the environment setting page looks like this: I have added an INT (integration developer org), UAT (developer org), Development Org (scratch org) and release org (production org) already added before.

Plan Your Pipeline
A pipeline outlines the stages that work items pass through as they move from development to production during the release lifecycle.
There are various pipeline stages. Each pipeline stage is represented by a branch in the source control repository and an environment (currently a Salesforce org). After any changes have been promoted through the pipeline, it cannot be changed.

Congratulations ! 🎉 Your DevOps center app has been successfully configured.
Next >> Check out the DEMO video below :
